

Rustic farm kitchen decor never goes out of style, but it feels especially warm and welcoming right now. This look blends lived-in charm, practical storage, natural textures, and details that make a kitchen feel used and loved. Think weathered wood, vintage-inspired accents, open shelving, soft earthy colors, and pieces that look collected over time instead of bought in one day. Whether your kitchen is large and airy or small and compact, rustic farm styling can make it feel cozier without losing function. The key is mixing beauty with usefulness, so every basket, shelf, stool, and jar adds both character and purpose. In this post, you’ll find ten rustic farm kitchen decor ideas that are easy to picture, simple to style, and full of inviting details you can adapt to your own space without making it feel overly themed or heavy.
Quick List:
- Open Wooden Shelving
- Vintage-Style Kitchen Runner
- Beadboard Backsplash
- Hanging Copper Pots
- Weathered Wood Island
- Rustic Farm Storage Containers
- Warm Metal Light Fixtures
- Farmhouse Sink Feature
- Old Cutting Boards Decor
- Styled Kitchen Corner
Open Wooden Shelving
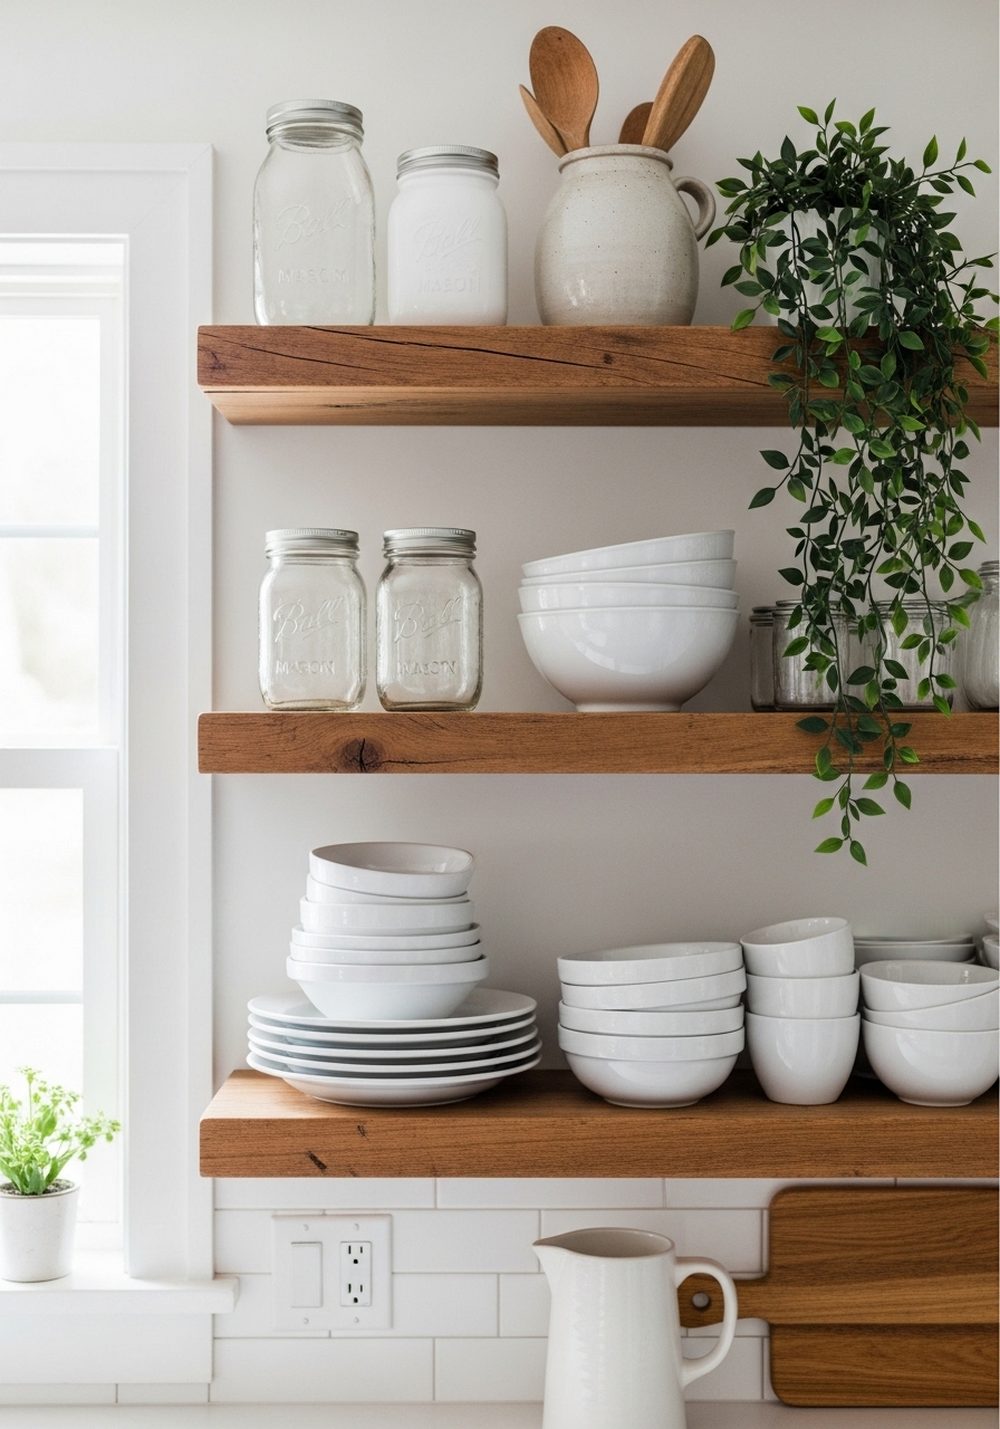
Open wooden shelving instantly gives a kitchen that relaxed farmhouse look while keeping essentials easy to reach daily. Use reclaimed or lightly distressed wood shelves to display white dishes, mason jars, pottery, and stacked bowls for a collected feel. Leave breathing room so the shelves look styled instead of crowded. Mixing practical pieces with decorative accents, like a small plant or vintage crock, helps the setup feel natural. This idea works especially well in kitchens that need warmth without adding bulky cabinets or visual heaviness.
Best For: Small or medium kitchens that need openness and warmth.
Where To Place It: Above counters, beside a range hood, or near a breakfast nook.
Color Palette Tip: Pair warm wood with creamy whites, soft sage, and muted beige tones.
Materials / Items Needed: reclaimed wood shelves, shelf brackets, white dishes, mason jars, pottery, small plant, vintage crock
Budget Level: Medium — Shelving costs vary, but styling can be done slowly over time.
DIY Difficulty: Medium — Installation takes measuring, wall anchoring, and balanced spacing.
Style It Like This: Stack plates in small groups. Add one trailing plant. Mix smooth ceramics with rough wood.
Common Mistake To Avoid: Overfilling every shelf makes the kitchen look cluttered instead of calm.
Vintage-Style Kitchen Runner

A vintage-style runner softens hard kitchen flooring and adds rustic charm with very little effort. Choose a faded pattern in warm earth tones, muted reds, soft blues, or washed neutrals to create that lived-in farm feel. A long runner works beautifully near the sink, island, or narrow walkway, bringing color and texture into the room. It also helps break up wood or tile floors. Look for something durable and easy to clean, so the space still feels practical for daily cooking, spills, and foot traffic.
Best For: Long, narrow kitchens or spaces with visible flooring that feels plain.
Where To Place It: In front of the sink, beside the island, or along a galley walkway.
Color Palette Tip: Choose washed red, faded blue, rust, or oatmeal tones for softness.
Materials / Items Needed: vintage-style runner, rug pad, washable fabric, muted patterned textile
Budget Level: Low to Medium — A runner changes the room without needing a full redesign.
DIY Difficulty: Easy — Just place it well and make sure it stays secure.
Style It Like This: Pick a faded pattern. Repeat one rug color in nearby accessories. Keep surrounding decor simple.
Common Mistake To Avoid: Choosing a rug that is too bright or too short for the space.
Beadboard Backsplash
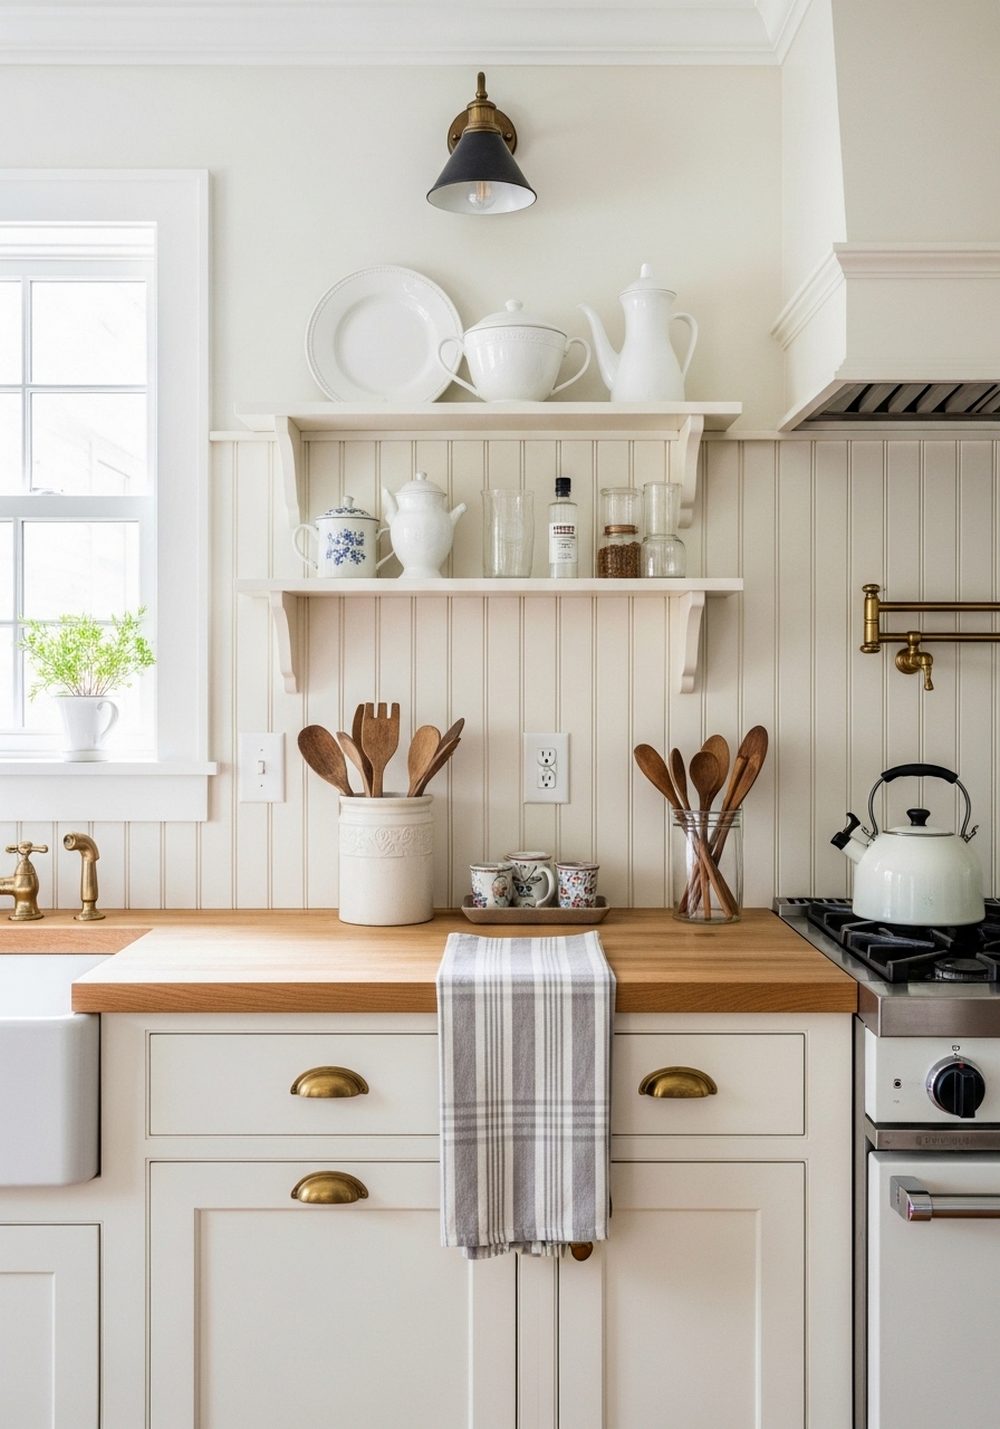
A beadboard backsplash adds gentle texture that feels classic, cozy, and unmistakably farmhouse. It is a choice if you want something softer than tile but still full of character. Painted in warm white, cream, sage, or soft gray, beadboard brightens the kitchen while giving walls more depth. Pair it with simple hardware, wood accents, and vintage-inspired lighting for a balanced look. This detail works especially well in smaller kitchens because it adds charm without feeling busy. A sealed finish helps it handle splashes more easily.
Best For: Cottage kitchens, farmhouse spaces, and smaller layouts needing subtle texture.
Where To Place It: Behind countertops, around a coffee station, or on a full backsplash wall.
Color Palette Tip: Soft cream, warm white, pale sage, or dusty gray keeps it timeless.
Materials / Items Needed: beadboard panels, paint, trim, caulk, sealant, nails or adhesive
Budget Level: Medium — It looks custom without the cost of premium tile.
DIY Difficulty: Medium — Cutting and sealing carefully makes the finished result look polished.
Style It Like This: Use soft paint. Add wood accents nearby. Keep hardware classic and understated.
Common Mistake To Avoid: Skipping the protective finish in splash-prone areas.
Hanging Copper Pots
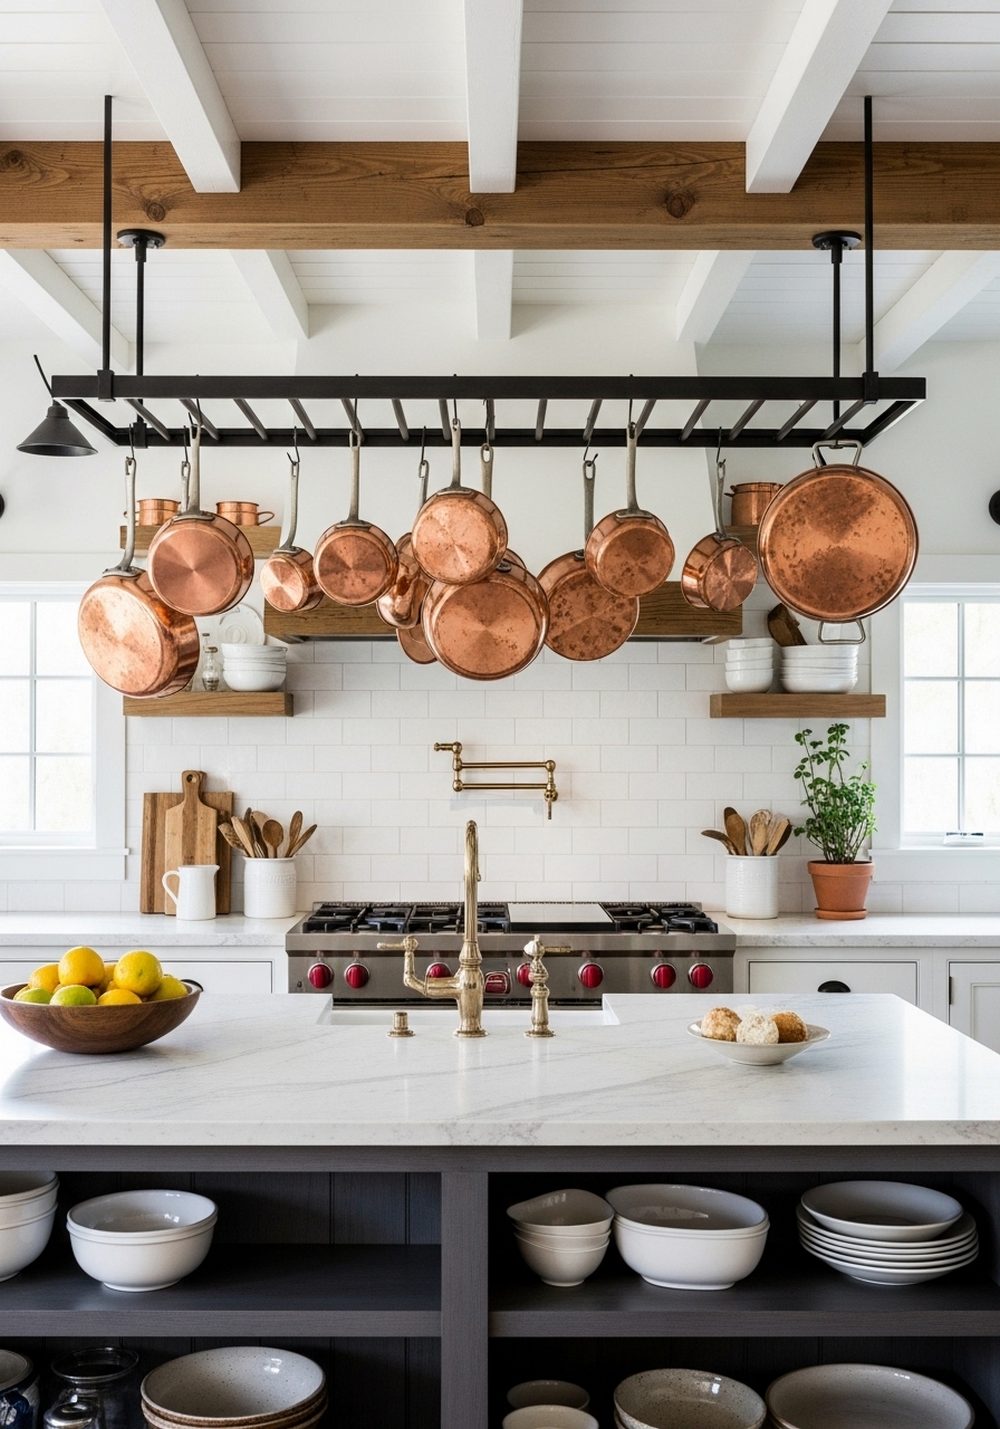
Hanging copper pots turns practical cookware into decor and instantly adds old-world warmth. The rich metal tone looks beautiful against white walls, natural wood, and stone-inspired surfaces, making the kitchen feel layered and timeless. Use a ceiling rack, wall bar, or sturdy rail to keep pans visible and accessible. Even a small collection makes an impact when arranged neatly. Copper catches light, so it adds brightness and texture. This idea is perfect for farm kitchens because it blends storage, usefulness, and character in one feature.
Best For: Kitchens with extra wall space, ceiling height, or a visible island area.
Where To Place It: Above an island, along a wall rail, or beside the stove.
Color Palette Tip: Copper glows best with cream, charcoal, warm wood, and muted stone shades.
Materials / Items Needed: copper pots, hanging rack, wall rail, hooks, ceiling anchors
Budget Level: High — Real copper can be an investment, but the look is striking.
DIY Difficulty: Medium — Secure installation matters more than styling here.
Style It Like This: Hang only a few pieces. Keep spacing even. Let the metal be the focal point.
Common Mistake To Avoid: Crowding too many pots into one area.
Weathered Wood Island
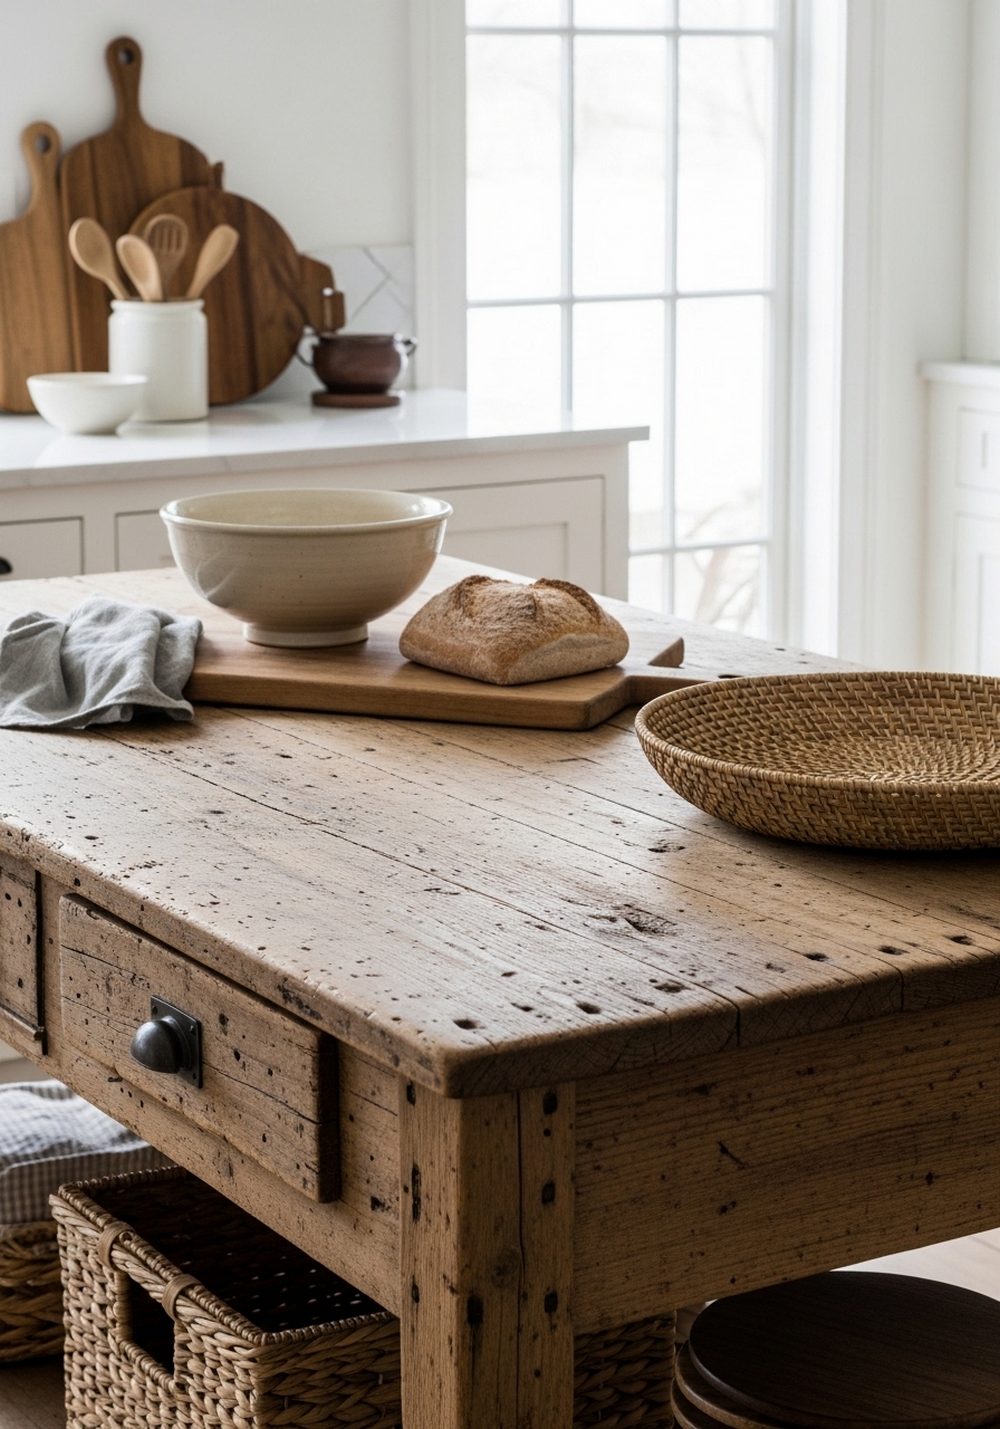
A weathered wood island or butcher block cart becomes the hardworking heart of a rustic farm kitchen. The worn texture adds age and authenticity, while the extra surface makes meal prep easier every day. Choose a piece with visible grain, softened edges, or a distressed finish that feels naturally aged instead of polished. You can style it with a bread board, ceramic bowl, or woven basket for a relaxed look. This decor choice also adds warmth, especially in kitchens with white cabinets or metal finishes.
Best For: Kitchens that need warmth, prep space, and a strong visual anchor.
Where To Place It: In the center of the kitchen or as a movable prep station.
Color Palette Tip: Pair weathered brown wood with creamy paint, black accents, and soft linen tones.
Materials / Items Needed: wood island or cart, bread board, ceramic bowl, woven basket, stool
Budget Level: Medium to High — A quality island adds both style and function.
DIY Difficulty: Medium — Refinishing or distressing can be done at home with patience.
Style It Like This: Add one bowl, one basket, and one board. Leave the top mostly open.
Common Mistake To Avoid: Choosing wood that looks overly orange or too glossy.
Rustic Farm Storage Containers
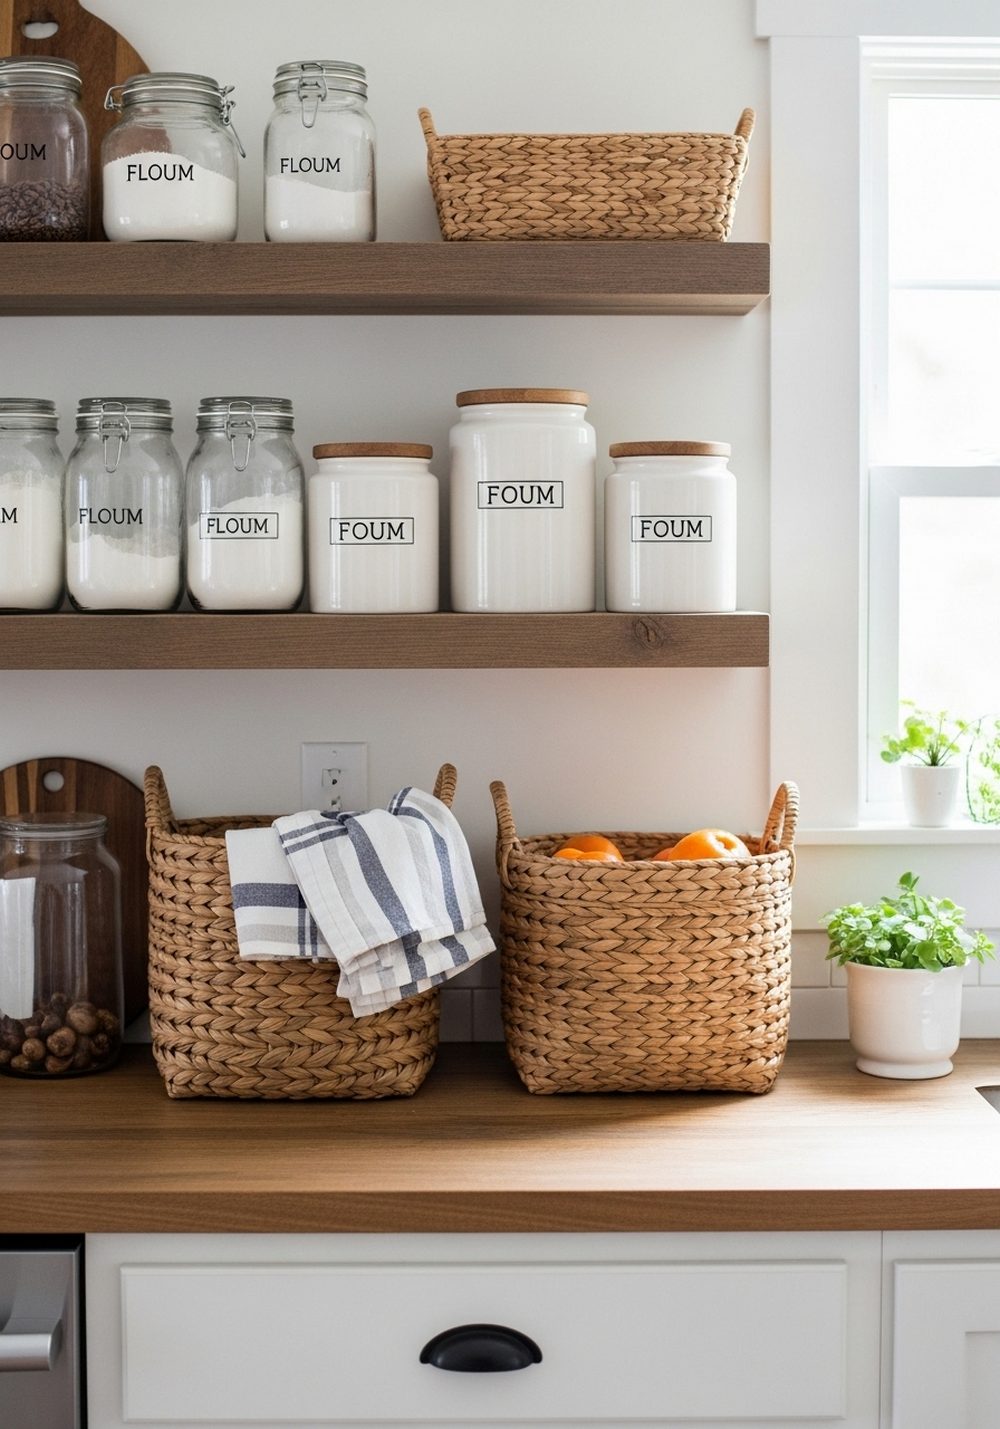
A mix of glass jars, ceramic canisters, and woven baskets creates storage that feels warm and inviting daily. Use them for flour, sugar, coffee, utensils, produce, or kitchen towels so the room stays organized without losing charm. Clear containers keep staples visible, while baskets soften the look with natural texture. Grouping a few storage pieces together on a counter or open shelf makes the arrangement feel intentional. In a rustic farm kitchen, organization should look warm and collected, not sterile, and this idea does that.
Best For: Busy kitchens that need visible storage without losing a cozy look.
Where To Place It: On open shelves, countertops, pantry corners, or beside the coffee station.
Color Palette Tip: Mix clear glass with cream ceramic and honey-toned woven textures.
Materials / Items Needed: glass jars, ceramic canisters, woven baskets, labels, folded towels, produce bowl
Budget Level: Low to Medium — You can build the collection piece by piece.
DIY Difficulty: Easy — Most of the work is styling and organizing well.
Style It Like This: Group similar materials together. Vary heights. Keep labels simple or skip them entirely.
Common Mistake To Avoid: Mixing too many container styles so the setup looks random.
Warm Metal Light Fixtures
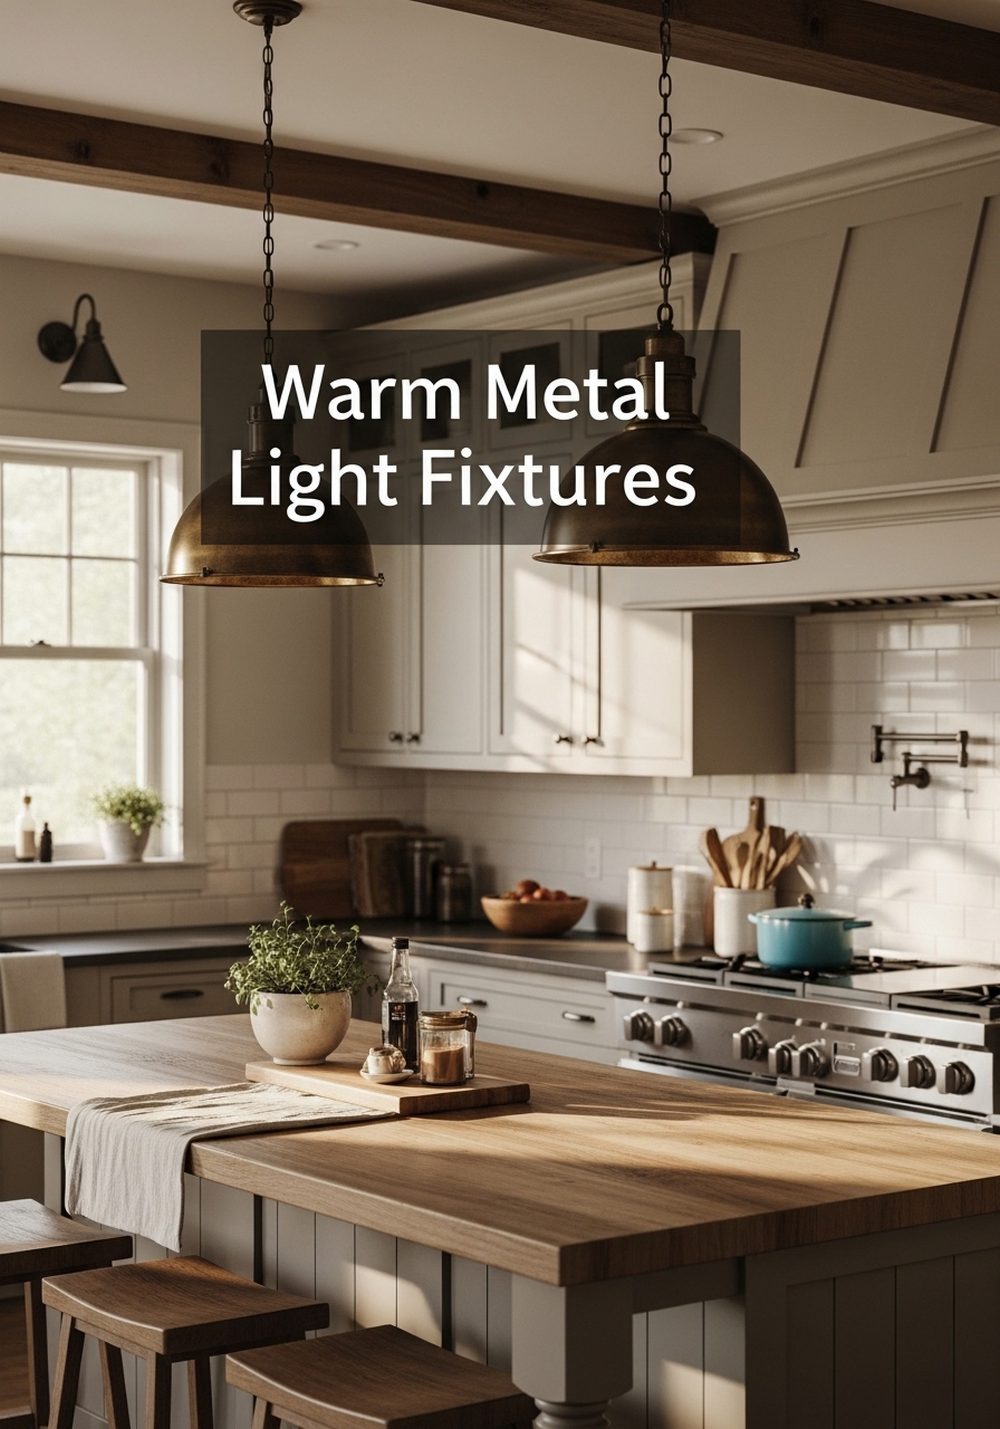
Warm metal light fixtures help set the mood in a rustic farm kitchen while adding a focal point. Look for pendants, sconces, or lantern-style lights in aged brass, bronze, matte black, or antique finishes. These tones pair beautifully with wood beams, open shelves, and neutral cabinetry. Good lighting makes the kitchen feel more inviting, especially over islands, sinks, and dining nooks. The right fixture can make even a simple kitchen look designed. Choose shapes that feel sturdy and timeless rather than sleek for best results.
Best For: Kitchens that feel flat, dark, or visually unfinished.
Where To Place It: Over the island, above the sink, or beside open shelving.
Color Palette Tip: Warm metals pair beautifully with creamy walls, wood, and charcoal accents.
Materials / Items Needed: pendant lights, sconces, bulbs, metal finish hardware, ceiling mount kit
Budget Level: Medium — One great fixture can shift the whole room’s mood.
DIY Difficulty: Medium to Hard — Electrical work may need professional help.
Style It Like This: Pick one metal family. Repeat it in hardware. Use warm bulbs for softness.
Common Mistake To Avoid: Choosing lighting that feels too modern for the rest of the kitchen.
Farmhouse Sink Feature
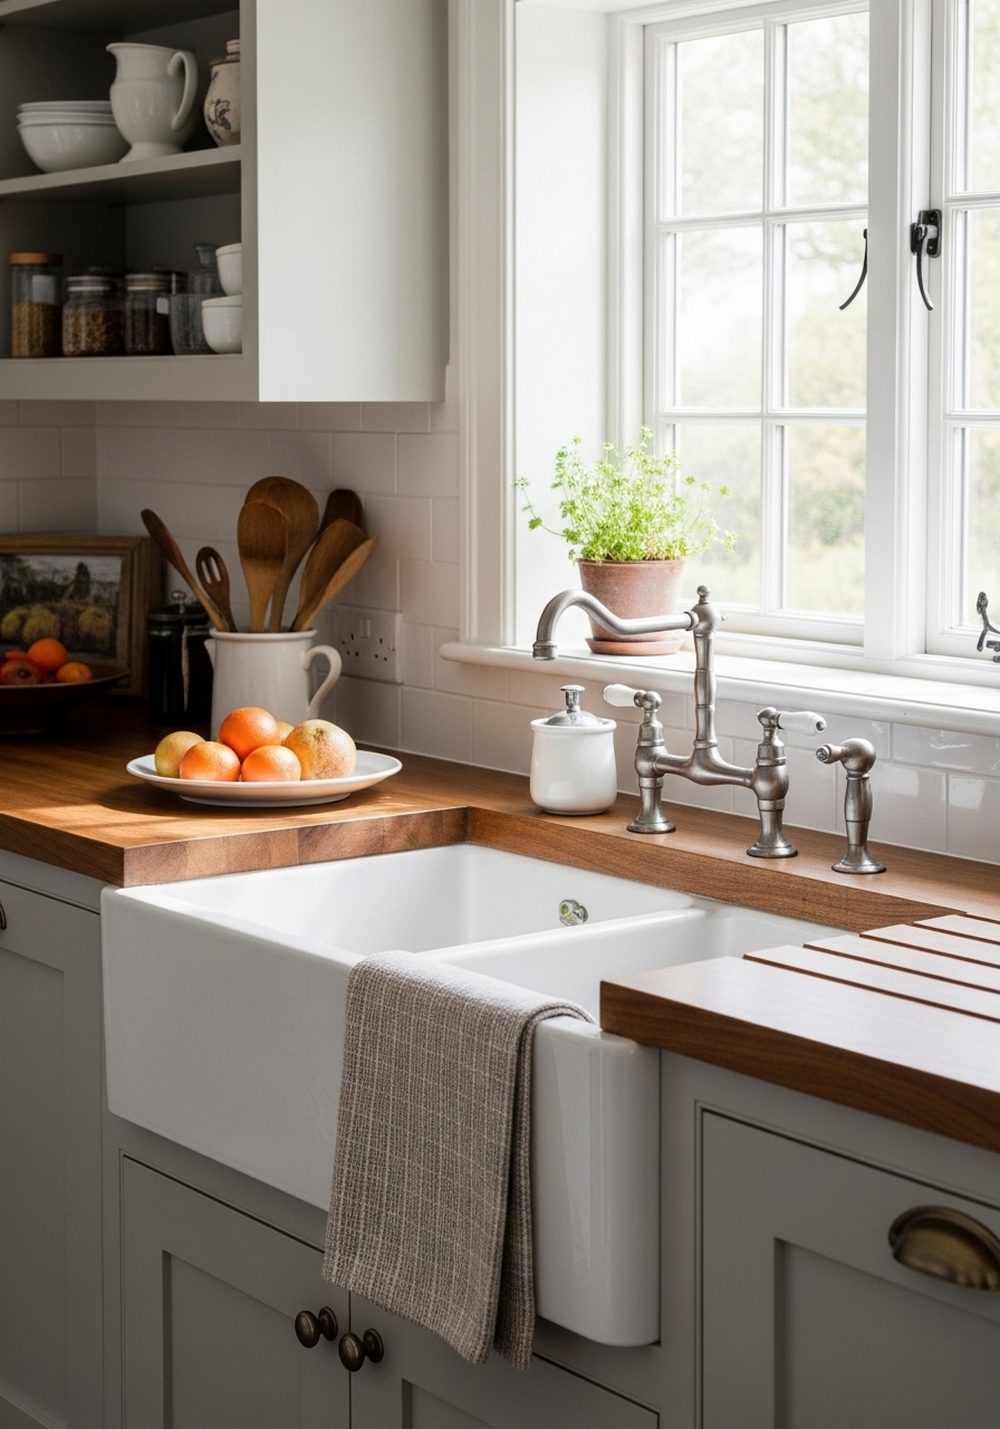
A farmhouse sink brings instant country character while still being one of the most practical upgrades for use. Its deep basin handles large pots, baking trays, and cleanup days with ease, making it as useful as it is beautiful. Pair it with a bridge faucet, unlacquered brass, or matte black hardware to enhance the rustic look. Because the sink front stays visible, it naturally becomes part of the decor. In a farm-inspired kitchen, this feature creates a timeless, hardworking feeling that anchors space with charm.
Best For: Family kitchens, baking spaces, or homes that want classic farmhouse appeal.
Where To Place It: At the main sink area, ideally centered under a window.
Color Palette Tip: Crisp white sinks pair well with wood, brass, black, and soft green.
Materials / Items Needed: farmhouse sink, bridge faucet, hardware, sink apron front, counter cutout
Budget Level: High — It is a statement upgrade with everyday value.
DIY Difficulty: Hard — Cabinet and plumbing adjustments are often required.
Style It Like This: Add a wood cutting board nearby. Choose classic hardware. Keep surrounding decor simple.
Common Mistake To Avoid: Installing one without checking cabinet support and depth first.
Old Cutting Boards Decor
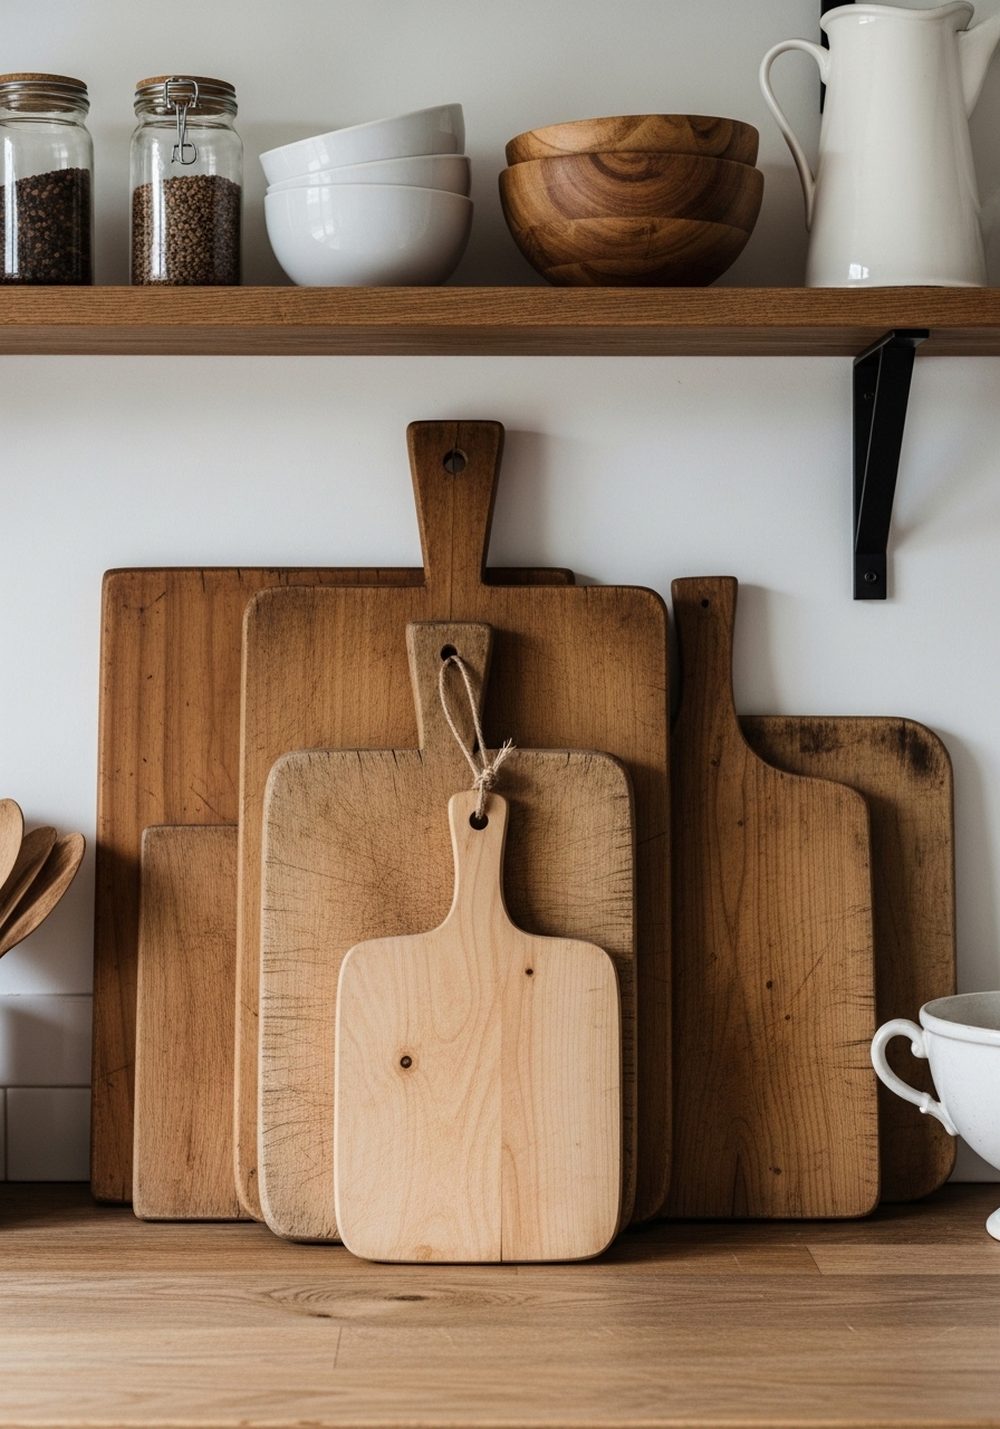
Decorating with old cutting boards and bread boards adds rustic warmth in a simple, low-effort way. Lean a few boards of different sizes against the backsplash or display them on open shelves for an easy layered look. Wood tones instantly soften stone, tile, or painted cabinetry, making the kitchen feel more balanced and lived in. Choose boards with worn edges, visible grain, and imperfections for best effect. Since they are useful as well as decorative, they fit farmhouse styling that values beauty, practicality, and comfort.
Best For: Renters, budget decorators, or anyone wanting a fast rustic update.
Where To Place It: Against the backsplash, on open shelves, or near a prep corner.
Color Palette Tip: Mix medium and dark wood tones with soft whites and muted green accents.
Materials / Items Needed: vintage cutting boards, bread boards, wood tray, shelf space, backsplash area
Budget Level: Low — Thrifted boards often look better than brand-new ones.
DIY Difficulty: Easy — This is mostly about arrangement and scale.
Style It Like This: Layer different sizes. Mix round and rectangular shapes. Keep nearby decor minimal.
Common Mistake To Avoid: Using only one board, which can look accidental instead of styled.
Styled Kitchen Corner
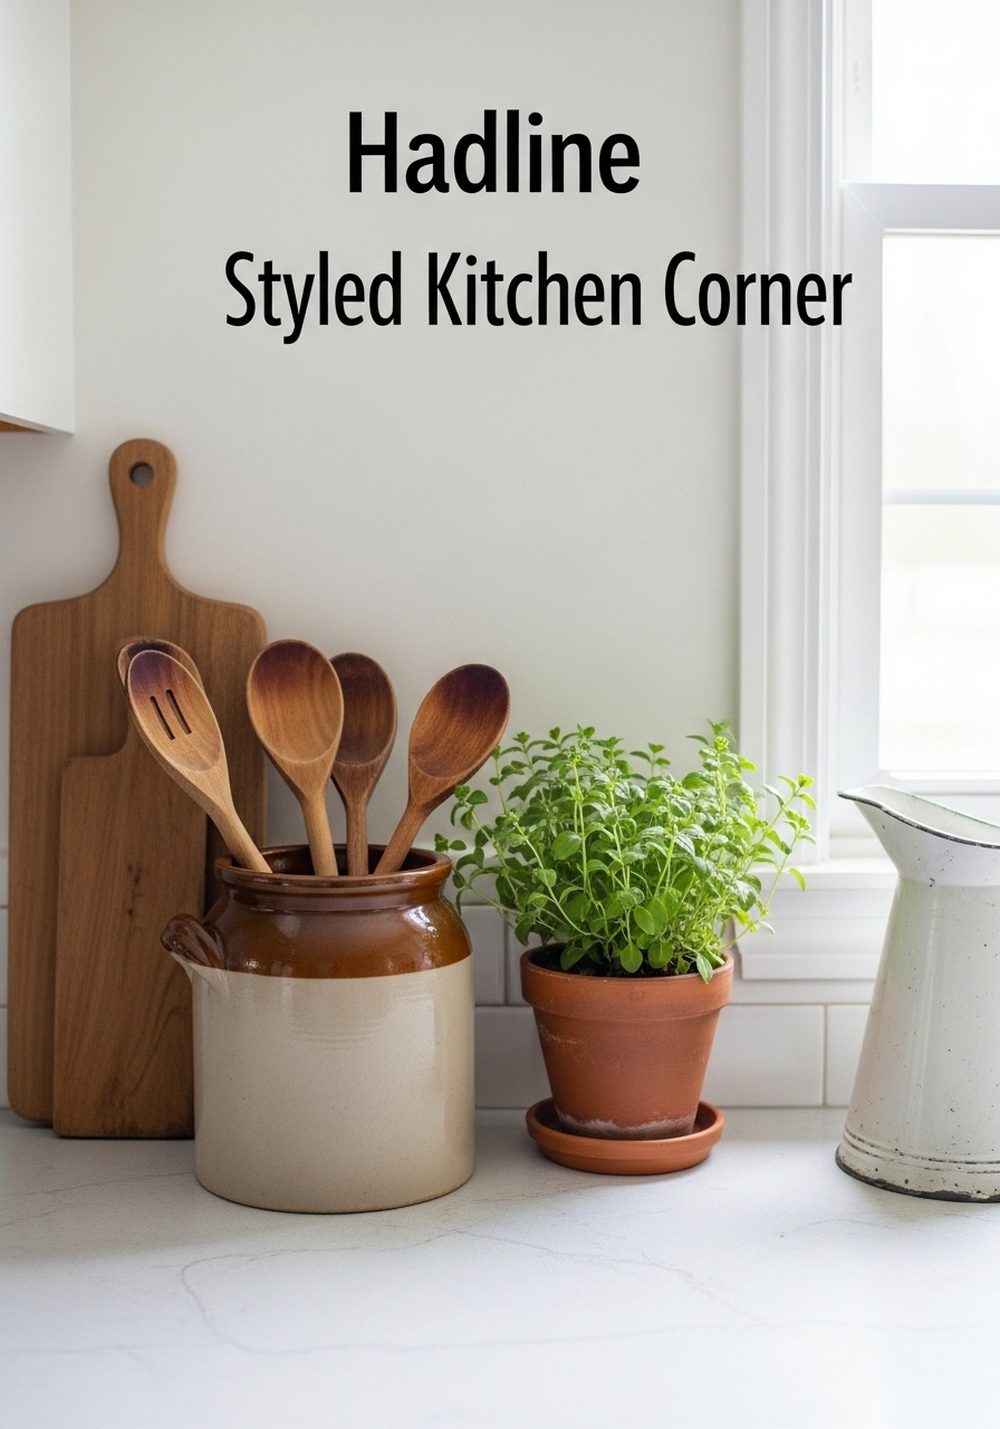
A small styling corner with crocks, greenery, and antique kitchen pieces can make the entire room feel personal. Use a countertop corner, shelf end, or windowsill to gather simple items like a stoneware crock, a wooden spoon, a tiny potted herb, and a vintage pitcher. The goal is not to fill every empty spot, but to create one thoughtful moment that adds soul. Rustic farm kitchens feel best when they look gently collected over time. This vignette brings softness, story, and charm without affecting function.
Best For: Kitchens that already feel functional but need more personality.
Where To Place It: On a quiet countertop corner, shelf edge, or sunny windowsill.
Color Palette Tip: Keep it earthy with cream, faded green, warm brown, and aged white.
Materials / Items Needed: stoneware crock, wooden spoon, small potted herb, vintage pitcher, tray
Budget Level: Low — A few collected pieces can create a finished look.
DIY Difficulty: Easy — Styling is simple once the grouping feels balanced.
Style It Like This: Use odd numbers. Vary heights. Keep the vignette small and breathable.
Common Mistake To Avoid: Adding too many decorative items that interfere with kitchen use.
Conclusion
Rustic farm kitchen decor works best when it feels useful, layered, and a little lived in. You do not need a full renovation to get this look. Even a few smart updates, like open shelves, warm lighting, wood accents, and vintage-style storage, can change the mood of the room. Start with one idea that fits your kitchen layout, then build slowly. The charm comes from mixing practical pieces with details that feel collected and personal.
FAQs
Q1: How do I make my kitchen look rustic farmhouse without remodeling?
A: Start with surface-level changes like wood accents, vintage-style runners, open shelving, and warm metal lighting.
Small styling upgrades can completely change the feel without replacing cabinets or counters.
Q2: What colors work best in a rustic farm kitchen?
A: Warm whites, cream, sage green, soft gray, muted blue, and natural wood tones work beautifully.
These shades keep the kitchen feeling calm, collected, and timeless.
Q3: Can rustic farm decor work in a small kitchen?
A: Yes, it works especially well in small kitchens when you focus on texture and useful decor.
Open shelves, runners, and compact styled corners add charm without taking over the room.
Q4: What materials make a kitchen feel more farmhouse?
A: Reclaimed wood, beadboard, stoneware, woven baskets, copper, iron, and ceramic all help create that look.
Natural materials always make the space feel warmer and more grounded.
Q5: How do I keep rustic decor from looking too cluttered?
A: Choose fewer, more useful pieces and leave breathing room between styled items.
Rustic farm kitchens look best when they feel collected, not crowded.

